Flutter Animations Simplified III
With implicit animations, we are creating code in a declarative manner. We tell them how to look like (instead of how to do it) by just writing the values we want them to take. Just as simple as that!
But what if we wanted, for example, a repeating animation? We’d need to write a lot of boilerplate involving the setState function to get what we want in our Flutter app.
In this article I’ll introduce the evil twin of implicit animations: explicit animations!
IMPORTANT: all the code present in this article is compatible with Flutter 2!
Level 2: Explicit Animations
Explicit Animations are just animations you have more control on. Unlike implicit animations, you’ll be writing imperative code, meaning that you’ll tell the animation what to do, and how to do it.
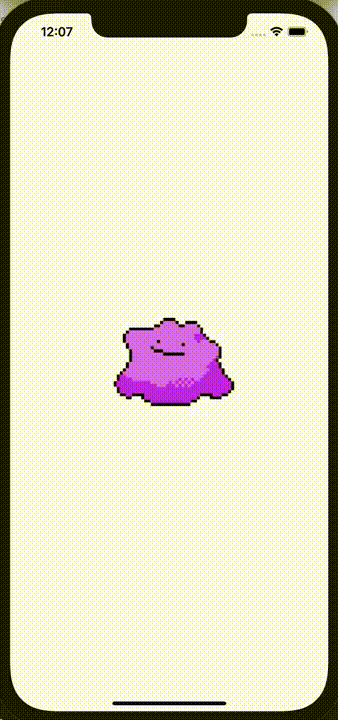
But first, let’s take a look to this animation:

How could we achieve this result by only using implicit animations? The solution I found was to use a TweenAnimationBuilder and Trasnform widgets (since there is no built-in rotation widget), and add 2π radians to the Ditto’s rotation angle every 5 seconds:
@override
void initState() {
  super.initState();
  // set timer
  timer = Timer.periodic(Duration(seconds: 5), _setNewAngle);
}void _setNewAngle(Timer t) {
  setState(() {
    // change Ditto's angle
    angle += 2 * pi;
  });
}
But I see some main problems with this code:
- By using the
Timeryou are managing more than the animation values, which, in a certain way, would be breaking the declarative nature of implicit animations. - If you timer is not cancelled in the
disposemethod, there would be memory leaks in the app, because it would reference objects that no longer exist. - What if we want it to stop? We should cancel the timer, and if we want it to restart, we’d need to create a new timer, having a lot of objects for simple actions.
We can replace the timer with a kind of controller that solves all of this problems. And yeah, it already exists! Let me introduce the AnimationController:
class _CeciNestPasUnePipeState
    extends State<CeciNestPasUnePipe>
    with SingleTickerProviderStateMixin {
  late AnimationController controller;

  @override
  void initState() {
    super.initState();
    controller = AnimationController(
      duration: Duration(seconds: 5),
      vsync: this,
    );
  }
As you can see, the AnimationController receives a Duration, and a vsync parameter of the type TickerProvider. This code works because our widget uses the SingleTickerProviderStateMixin, which allows our widget behave like a TickerProvider.
In a few words, a Ticker is an object that will receive a callback and call it once per animation frame. So, if you app runs at 60fps, the callback will be called 60 times, once every frame.
The AnimationController has some self-explanatory methods that solve very intuitively the problems mentioned before:
controller.repeat();
controller.forward();
controller.stop();
controller.reverse();
controller.reset();
Something important to add is that you need to dispose your controller in the dispose method of the widget, in order to prevent memory leaks (that’s something we cannot get rid of):
@override
void dispose() {
  controller.dispose();
  super.dispose();
}
Enter Transition classes
Ok, we have our controller, but what can we do with it? What can we control? How can we use the controller to create a forever spinning Ditto? The Transition classes are exactly what we need! For simplicity, let’s take the RotationTransition widget:
@override
Widget build(BuildContext context) {
  return RotationTransition(
    child: Image.asset('assets/ditto.png'),
    turns: controller,
  );
}
The RotationTransition will receive a turns parameter of the type Animation<double>. Under the hood, AnimationController implements this interface, meaning that it will be interpolate between 0.0 and 1.0. But first, we’d need to launch our animation using the methods mentioned before:
@override
void initState() {
  super.initState();
  ...
  controller.repeat();
}
Technically, we have our forever spinning Ditto! But we can do a little bit more with our controller! Let’s add more functionalities:
void _stopOrStartAnimation() {
  if (controller.isAnimating) {
    controller.stop();
  } else {
    controller.repeat();
  }
}void _invertAnimationDirection() {
  if (controller.status == AnimationStatus.reverse) {
    controller.repeat();
  } else if (controller.status == AnimationStatus.forward) {
    controller.reverse();
  }
}@override
Widget build(BuildContext context) {
  return InkWell(
    onTap: _stopOrStartAnimation,
    onLongPress: _invertAnimationDirection,
We can check the status of the controller, we can check if it is animating, if it is going backwards, if the animation was completed or dismissed, and based on that information we can tell the controller what’s the next action to do: imperative code.
Curved Animations
There are a lot of built-in transition widgets (we can even create our own ones, but that’s for the next chapter). But some of them, instead of using Animation<double> objects (like the AnimationController), use, for example, Animation<RelativeRect> or Animation<Rect> .
In previous chapters we talked about the important role of interpolation. Under certain conditions, we can interpolate almost any type of data possible (we’ve already done it). The Tween classes allowed us to do that, but they also allow us to create animations objects based on those values!
Taking a look to the SlideTransition, it receives an Animation<Offset> object. We can create a Tween<Offset> and use the magical method animate to create our animation:
late Animation<Offset> offsetAnimation;...offsetAnimation = Tween(
  begin: Offset.zero,
  end: Offset(0.0, 1.5),
).animate(
  CurvedAnimation(
    parent: controller,
    curve: Curves.linear,
  ),
);...@override
Widget build(BuildContext context) {
  return SlideTransition(
    child: Image.asset('assets/ditto.png'),
    position: offsetAnimation,
  );
}
The animate method receives a CurvedAnimation, which is described as:
An animation that applies a curve to other animation
So, for short, we are applying a linear curve to the controller (which is an animation from 0.0 to 1.0), but taking the values of the Tween object, which are Offset values, and, in consequence, we’ll have the Animation<Offset> object we need.

We can even apply different curves to our curved animation and have a more interesting animation:
Conclusion
We have more control on our animations with less boilerplate and more readable code. However, it’s importante to distinguish if we need either implicit or explicit animations. Because both solutions can solve the same problems but fit differently in our use cases.
Do not forget to star the project repo. ;)
